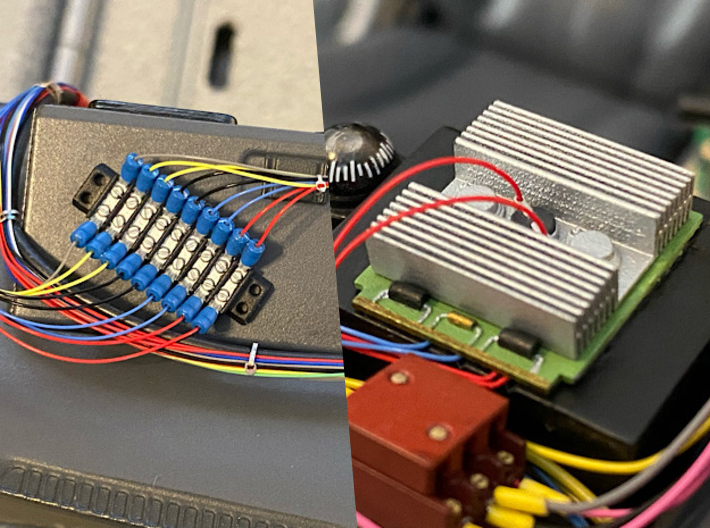
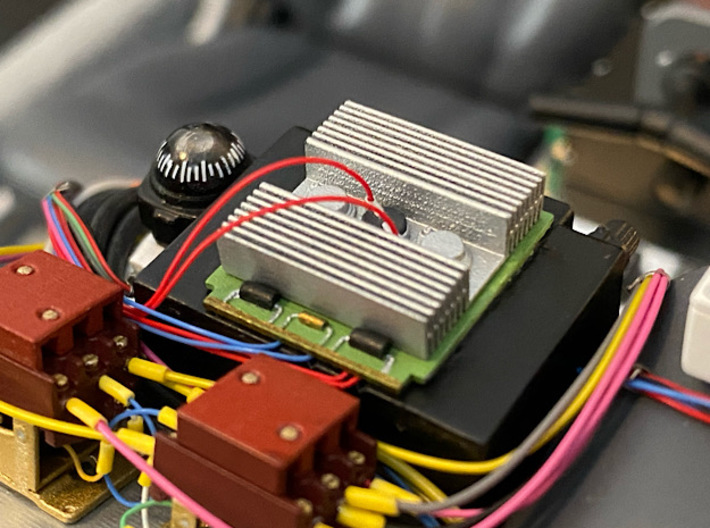
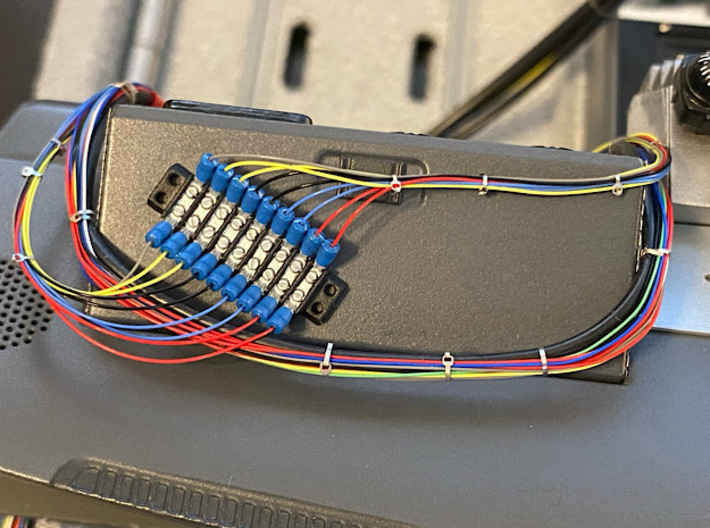
This is how the painted parts look on the model


1:8 BTTF DeLorean dashboard set
Made by
Print With Shapeways
 Choose Your Material
 Choose your color and finish
$16.00
Have a question about this product?
contact the designerYou must be logged in and verified to contact the designer.
Product Description
This set is a more affordable solution for people who would like to purchase both the Radio Heatsink and the Dashboard Wire Terminal. If you only want one of those two then you're better off purchasing the single part.
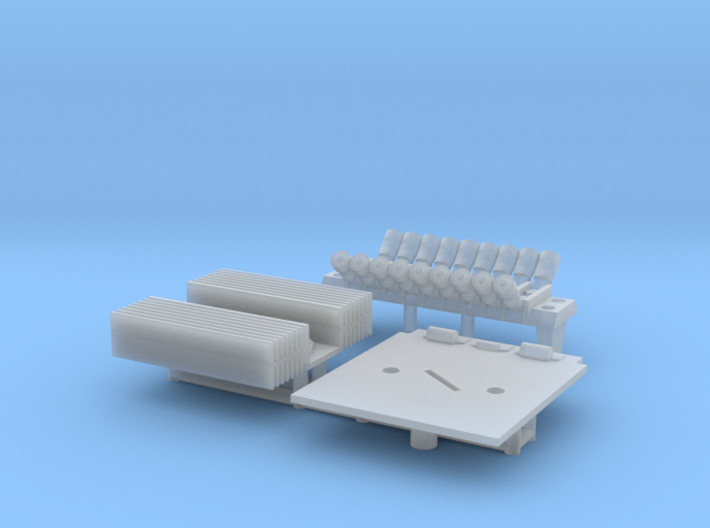
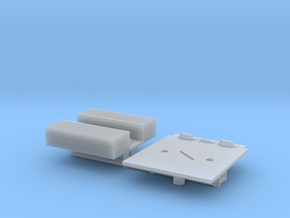
This set consist of two parts:
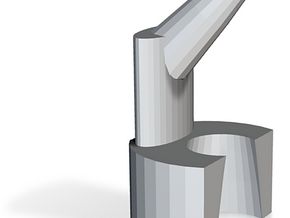
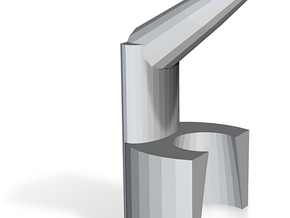
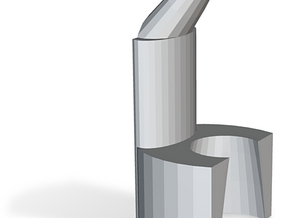
1. The Radio Heatsink
This is a 1:8 scale replica of the original heatsink that sits on top of the radio on the dashboard on the Back to the Future A-car DeLorean. Replaces part 42H. Specially designed for the 1:8 scale Eaglemoss DeLorean model.
The design was made to be used with 0.28mm diameter wire, that's half as thin as the stock ones in order to preserve accuracy.
Fully tested in order to make sure it fits perfectly. Only available in the highest resolution possible, because of the small details.
Paint instructions
Prime the parts with Tamiya grey primer. Paint the electronics board (the base where the heatsink is placed on) with Vallejo Pale green (71095). Paint the outer most resistors with black, then the front side of the circuit board (the one facing the front of the car) with Vallejo Brass (70801). Also use Vallejo Brass with one drop of black to paint the central resistor.
The heatsink itself can be painted with Vallejo steel (71065) and the top part of the central transistor (the one where the wires attach to) with black.
Assembly
After installing the wire you can glue the heatsink on top of the green circuit board. Then just clip the circuit board into the dedicated holes in the radio. No screwing required.
2. Dashboard wires terminal
This is a 1:8 scale replica of the dashboard wires terminal of the Back to the Future DeLorean A-car. Replaces part 48A. Specially designed for the 1:8 scale Eaglemoss DeLorean.
The design was made to be used with 0.28mm diameter wire, that's half as thin as the stock ones in order to preserve accuracy.
Fully tested in order to make sure it fits perfectly. Only available in the highest resolution possible, because of the small details.
Paint instructions
Prime the parts with Tamiya grey primer. Paint the whole terminal with black, then paint the contacts with Vallejo Steel (71065) and paint the crimp part of the contacts with blue. For the blue you can use Vallejo Blue Angel 71.090 for the blue parts mixed with a little bit of Vallejo White 71.119 to make the blue a little lighter.
Assembly
The termial uses the same clips as the kit part. Just push it in from the sides, no screwing required. Do not push or exert any pressure on the contacts.
This set consist of two parts:
- The Radio Heatsink
- The Dashboard Wire Terminal
1. The Radio Heatsink
This is a 1:8 scale replica of the original heatsink that sits on top of the radio on the dashboard on the Back to the Future A-car DeLorean. Replaces part 42H. Specially designed for the 1:8 scale Eaglemoss DeLorean model.
The design was made to be used with 0.28mm diameter wire, that's half as thin as the stock ones in order to preserve accuracy.
Fully tested in order to make sure it fits perfectly. Only available in the highest resolution possible, because of the small details.
Paint instructions
Prime the parts with Tamiya grey primer. Paint the electronics board (the base where the heatsink is placed on) with Vallejo Pale green (71095). Paint the outer most resistors with black, then the front side of the circuit board (the one facing the front of the car) with Vallejo Brass (70801). Also use Vallejo Brass with one drop of black to paint the central resistor.
The heatsink itself can be painted with Vallejo steel (71065) and the top part of the central transistor (the one where the wires attach to) with black.
Assembly
After installing the wire you can glue the heatsink on top of the green circuit board. Then just clip the circuit board into the dedicated holes in the radio. No screwing required.
2. Dashboard wires terminal
This is a 1:8 scale replica of the dashboard wires terminal of the Back to the Future DeLorean A-car. Replaces part 48A. Specially designed for the 1:8 scale Eaglemoss DeLorean.
The design was made to be used with 0.28mm diameter wire, that's half as thin as the stock ones in order to preserve accuracy.
Fully tested in order to make sure it fits perfectly. Only available in the highest resolution possible, because of the small details.
Paint instructions
Prime the parts with Tamiya grey primer. Paint the whole terminal with black, then paint the contacts with Vallejo Steel (71065) and paint the crimp part of the contacts with blue. For the blue you can use Vallejo Blue Angel 71.090 for the blue parts mixed with a little bit of Vallejo White 71.119 to make the blue a little lighter.
Assembly
The termial uses the same clips as the kit part. Just push it in from the sides, no screwing required. Do not push or exert any pressure on the contacts.
Details
What's in the box:
Dashboard_set_rev_F

Dimensions:
Success Rate:
First To try.
What's this?
Rating:
Mature audiences only.
